Driller源码分析02

Driller 源码分析

本篇从整体程序的执行流程来分析 Driller 工具的功能,并针对 use_techniques 方法进行了较为详细的解释,理清了 angr 是如何同时应用多个 exploration_techniques 来协同进行符号执行的。

0x01 run_driller.py 脚本分析

这里,先放下在项目搭建时,我们用到的运行 driller 的脚本 run_driller.py :

1
2
3
4
5
6
7
8
9
10
11
12
13
14
15
16
17
18
19
20
21
22
23
24
25
26
27
28
29
30
31
32
33
34
35
36
37
38
39
40
41
42
43
44
45
46
47
48
49
50
51
52
53
54
55
56
57
58
59
60
61
62
63
64
65
66
67
68
69
70
71
72
73
74
75
76
77
78
#!/usr/bin/env python

import errno
import os
import os.path
import sys
import time

from driller import Driller


def save_input(content, dest_dir, count):
"""Saves a new input to a file where AFL can find it.
File will be named id:XXXXXX,driller (where XXXXXX is the current value of
count) and placed in dest_dir.
"""
name = 'id:%06d,driller' % count
with open(os.path.join(dest_dir, name), 'wb') as destfile:
destfile.write(content)


def main():
if len(sys.argv) != 3:
print('Usage: %s <binary> <fuzzer_output_dir>' % sys.argv[0])
sys.exit(1)
#将第一个参数也就是binary文件路径赋值给binary变量
#将第二个参数也就是AFL output的文件夹赋值给fuzzer_dir,用来保存driller生成的input
_, binary, fuzzer_dir = sys.argv

# Figure out directories and inputs
# 获取AFL的bitmap值
with open(os.path.join(fuzzer_dir, 'fuzz_bitmap'), 'rb') as bitmap_file:
fuzzer_bitmap = bitmap_file.read()
# 获取AFL输入队列的目录
source_dir = os.path.join(fuzzer_dir, 'queue')
# driller输出目录
dest_dir = os.path.join(fuzzer_dir, '..', 'driller', 'queue')

# Make sure destination exists
try:
os.makedirs(dest_dir)
except os.error as e:
if e.errno != errno.EEXIST:
raise

seen = set() # Keeps track of source files already drilled
# driller/queue目录中的数量
count = len(os.listdir(dest_dir)) # Helps us name outputs correctly

# Repeat forever in case AFL finds something new
while True:
# Go through all of the files AFL has generated, but only once each
for source_name in os.listdir(source_dir):
# 如果 source_name 已经在 seen 中,表示已经处理过这个 input,直接跳过
if source_name in seen or not source_name.startswith('id:'):
continue
# 否则将其加入 seen 中,并将其作为 driller 的输入来做concolic execution
seen.add(source_name)
# 获取该种子文件的内容
with open(os.path.join(source_dir, source_name), 'rb') as seedfile:
seed = seedfile.read()

print('Drilling input: %s' % seed)
# 传入当前种子,和AFL的bitmap信息,调用Driller开始获取符号执行的生成的输入,并将这些输入都保存到指定目录中
for _, new_input in Driller(binary, seed, fuzzer_bitmap).drill_generator():
save_input(new_input, dest_dir, count)
count += 1

# Try a larger input too because Driller won't do it for you
seed = seed + b'0000'
print('Drilling input: %s' % seed)
for _, new_input in Driller(binary, seed, fuzzer_bitmap).drill_generator():
save_input(new_input, dest_dir, count)
count += 1
time.sleep(10)

if __name__ == '__main__':
main()

先看下脚本的大致功能:首先设置好需要用到的AFL的 queue 以及 bitmap 文件路径,及存储 driller 生成数据的路径,遍历 queue 中AFL认为 interesting 的 seeds,将其作为 driller 的输入进行 concolic execution,然后保存 driller 生成的数据到指定目录供 AFL 使用。

在 main 函数中,最关键的部分就是 Driller() 类以及其成员方法 drill_generator(),所以我们暂时只看 Driller 中发挥关键作用的部分(即这个 drill_generate() ,其他的诸如 shellphuzzFuzzer 等,都是对已有工具的包装,是一个 wrapper ,留着以后再分析。

0x02 driller 关键函数源码分析

Driller 源码地址为:https://github.com/shellphish/driller

Driller 类以及成员函数 drill_generate() 定义在 driller_main.py 文件中,类中主要函数如下:

1
2
3
4
5
6
7
8
9
10
11
12
13
14
class Driller(object)
"""
Driller object, symbolically follows an input looking for new state transitions.
"""
def __init__(self, binary, input_str, fuzz_bitmap=None, tag=None, redis=None, hooks=None, argv=None)
# DRILLING
def drill_generator(self)
def _drill_input(self)
# EXPLORE
def _symbolic_explorer_stub(self, state)
# UTILS
@static
def _set_concretizations(state)
def _writeout(self, prev_addr, state)

我们先看类的构造函数 __init__() 进行的初始化操作:

1
2
3
4
5
6
7
8
9
10
11
12
13
14
15
16
17
18
19
20
21
22
23
24
25
26
27
28
29
30
31
32
33
34
35
36
37
38
39
40
41
42
43
44
45
46
def __init__(self, binary, input_str, fuzz_bitmap=None, tag=None, redis=None, hooks=None, argv=None):
"""
:param binary : The binary to be traced.
:param input_str : Input string to feed to the binary.
:param fuzz_bitmap: AFL's bitmap of state transitions (defaults to empty).
:param redis : redis.Redis instance for coordinating multiple Driller instances.
:param hooks : Dictionary of addresses to simprocedures.
:param argv : Optionally specify argv params (i,e,: ['./calc', 'parm1']),
defaults to binary name with no params.
"""

self.binary = binary

# Redis channel identifier.
self.identifier = os.path.basename(binary) #self.identifier = self.binary_name
self.input = input_str
self.fuzz_bitmap = fuzz_bitmap
self.tag = tag
self.redis = redis
self.argv = argv or [binary]

self.base = os.path.join(os.path.dirname(__file__), "..")

# The simprocedures.要hook的函数
self._hooks = {} if hooks is None else hooks

# The driller core, which is now an exploration technique in angr.
# angr中的探索技术
self._core = None

# Start time, set by drill method.开始时间
self.start_time = time.time()

# Set of all the generated inputs.生成的input的集合
self._generated = set()

# Set the memory limit specified in the config.
if config.MEM_LIMIT is not None:
resource.setrlimit(resource.RLIMIT_AS, (config.MEM_LIMIT, config.MEM_LIMIT))
'''
使用 resource.RLIMIT_AS 来查询或设置进程的地址空间大小限制(内存限制)
eg: # 设置内存限制(单位:字节)
resource.setrlimit(resource.RLIMIT_AS, (1024 * 1024 * 256, 1024 * 1024 * 512)) # 设置软限制为256MB,硬限制为512MB
'''

l.debug("[%s] drilling started on %s.", self.identifier, time.ctime(self.start_time))

可以看到,前三个参数就是我们在 run_driller.py 脚本中传入的三个参数,分别是 bianry 文件的路径、binary 文件接受的输入(也就是 seeds)、AFL 的 bitmap 文件内容。后面参数的作用查看注释即可。在 __init__() 函数中,首先对类中的公有或私有(以_开头)属性进行赋值,并进行一些配置项的设置。

接下来,我们看脚本中调用的 drill_generator() 函数:

1
2
3
4
5
6
7
8
9
10
11
12
13
def drill_generator(self):
"""
A generator interface to the actual drilling.
真正drilling的生成器接口
"""

# Set up alarm for timeouts.
# 设置超时警报
if config.DRILL_TIMEOUT is not None:
signal.alarm(config.DRILL_TIMEOUT)

for i in self._drill_input():
yield i

可以看到,run_driller.py 脚本中调用的函数是一个生成器函数,在内部不断调用类私有方法 self._drill_input() 来获取 driller 生成的输入,并不断通过 yield 语句输出。

所以真正发挥作用的是 self._drill_input() 函数:

1
2
3
4
5
6
7
8
9
10
11
12
13
14
15
16
17
18
19
20
21
22
23
24
25
26
27
28
29
30
31
32
33
34
35
36
37
38
39
40
41
42
43
44
45
46
47
48
49
50
51
52
53
54
55
56
57
58
59
60
61
62
63
64
65
66
67
68
69
70
71
72
73
74
75
76
77
78
79
80
def _drill_input(self):
"""
Symbolically step down a path with a tracer, trying to concretize inputs for unencountered
state transitions.
沿着tracer给出的path一步一步符号化,尝试将未遇到的状态转换的输入具体化,即求解出未遇到状态的输入
"""

# initialize the tracer
# 实例化 QEMURunner 类对象
r = tracer.qemu_runner.QEMURunner(self.binary, self.input, argv=self.argv)
# 创建 angr project
p = angr.Project(self.binary)
# 对传入的需要 hook 的函数做 hook 操作
for addr, proc in self._hooks.items():
p.hook(addr, proc)
l.debug("Hooking %#x -> %s...", addr, proc.display_name)
# 判断待分析的binary的操作系统类型
if p.loader.main_object.os == 'cgc':
p.simos.syscall_library.update(angr.SIM_LIBRARIES['cgcabi_tracer'])

s = p.factory.entry_state(stdin=angr.SimFileStream, flag_page=r.magic, mode='tracing')
else:
# 除了 cgc 之外的,全部使用full_init_state获取初始状态。
# 将程序的标准输入流stdin符号化,设置mode为'tracing'
# 'tracing':这是一种常见的模式,用于创建一个用于路径跟踪(path tracing)的符号状态。在这种模式下,符号状态会记录路径执行的信息,包括指令和内存访问。这对于分析程序的执行路径非常有用。
s = p.factory.full_init_state(stdin=angr.SimFileStream, mode='tracing')
# 预先给符号执行添加约束,preconstrainer添加的约束可以在后面删除
# preconstrain_file方法用于为文件设置约束,将s.posix.stdin(符号执行的输入)设置为self.input(传递给Driller的testcase)
# True表示将文件内容解析为具体的数据值。这里应该是就是实现angr concolic execution的方式
s.preconstrainer.preconstrain_file(self.input, s.posix.stdin, True)

#save_unset 将不可满足的状态存入“unsat存储”,hierarchy表示一个StateHierarchy对象,来跟踪状态之间的关系。
simgr = p.factory.simulation_manager(s, save_unsat=True, hierarchy=False, save_unconstrained=r.crash_mode)
# 实例化一个Tracer类对象
# trace 参数指定了要跟踪的执行路径,探测器将按照提供的执行路径来执行程序
# crash_addr 参数指定了程序崩溃的地址,如果程序在执行过程中崩溃,探测器将停止跟踪,并记录crash state到“crashed” stash中
# copy_states=True:这个参数控制是否在跟踪过程中复制符号状态。如果设置为 True,则探测器会为每个跟踪步骤创建符号状态的副本,以防止状态共享和互相干扰。
# follow_unsat 参数控制是否跟踪不可满足的路径。如果设置为 True,则探测器将继续跟踪路径,即使遇到不可满足的约束条件。
t = angr.exploration_techniques.Tracer(trace=r.trace, crash_addr=r.crash_addr, copy_states=True, follow_unsat=True)

self._core = angr.exploration_techniques.DrillerCore(trace=r.trace, fuzz_bitmap=self.fuzz_bitmap)
'''
exploration_techniques:
Tracer():An exploration technique that follows an angr path with a concrete input.
The tracing result is the state at the last address of the trace, which can be found in the 'traced' stash.
If the given concrete input makes the program crash, you should provide crash_addr, and the crashing state will be found in the 'crashed' stash.
Oppologist():The Oppologist is an exploration technique that forces uncooperative code through qemu.
DrillerCore():An exploration technique that symbolically follows an input looking for new state transitions.
It has to be used with Tracer exploration technique. Results are put in 'diverted' stash.
'''
simgr.use_technique(t)
simgr.use_technique(angr.exploration_techniques.Oppologist())
simgr.use_technique(self._core)


# 设置对内存、寄存器符号化操作的阈值
self._set_concretizations(simgr.one_active)

l.debug("Drilling into %r.", self.input)
l.debug("Input is %r.", self.input)

while simgr.active and simgr.one_active.globals['trace_idx'] < len(r.trace) - 1:
simgr.step()

# Check here to see if a crash has been found.
if self.redis and self.redis.sismember(self.identifier + '-finished', True):
return
# diverted 应该是发生状态转移
if 'diverted' not in simgr.stashes:
continue
# 当检测到状态转移时,弹出状态 这里的diverted 是在DillerCore探索策略中的step方法中添加的
while simgr.diverted:
state = simgr.diverted.pop(0)
l.debug("Found a diverted state, exploring to some extent.")
# 首先调用_writeout来求解
w = self._writeout(state.history.bbl_addrs[-1], state)
if w is not None:
yield w
for i in self._symbolic_explorer_stub(state):
yield i

首先我们看到,该函数也是一个生成器函数,通过 yield 语句来返回生成的值,然后我们从头开始一点点分析该函数的功能。

函数首先实例化了一个 QEMURunner 类对象 r,该类定义在 angr 中的一个单独的模块 Tracer 中,该模块源码地址为:https://github.com/angr/tracer


Tracer 模块

This package is in a bit of a complicated transition phase - it originally housed the concolic tracing helpers for angr, but those pieces of code have since been merged into angr proper

进入仓库,可以看到其 Readme 给的信息很少,我们主要看看 driller 使用了 tracer 模块中的哪些 function,在项目中 grep 下,发现只有 driller_main.py 文件中使用了 tracer ,也就是实例化一个 QEMURunner 类对象:

1
r = tracer.qemu_runner.QEMURunner(self.binary, self.input, argv=self.argv)

接下来我们对对象 r 进行分析。在 driller_main.py 中,总共使用了 r 对象里的四个属性:r.tracer.magicr.crash_moder.crash_addr

QEMURunner() 类的构造函数大致功能为,将传入的 self.input 作为 self.binary 的输入,使用Qemu模拟执行 self.input,self.argv 是其命令行参数。(具体可查看源码,对于分析 driller 只需要理解大致功能就够用了)

r.trace:记录了对于此次输入 self.input 程序执行的基本块的序列(应该是Qemu记录到的,跟angr一样,对于call也会划分基本块)

r.crash_mode:记录此次输入执行后是否发生了crash

r.carsh_addr:记录此次输入执行后发生crash的 faulting 地址

r.magic:源码注释中说,作用是来保持符号跟踪与其 dynamic counterpart 遵循相同的路径,这个暂时没太看懂。

r.trace:以示例程序 buggy 来举例,编译时注意开下-no-pie

1
2
3
4
5
6
7
8
9
10
11
12
13
14
15
16
17
18
19
20
>>> import tracer
>>> r = tracer.qemu_runner.QEMURunner("./buggy",b"sth")
>>> for addr in r.trace:
if (addr<0x4000000000): #这里说明一下,r.tarce记录程序内所有基本块的地址,但我们只关注text中的addr,做粗略过滤
print(hex(addr))
···
0x4005a7
0x4004b0
0x4005f0
0x400629
0x400490
0x400635
0x40064e
0x400570
0x400579
0x400500
0x400528
0x400582
0x4006c4
>>>

Tracer 模块暂时介绍到这里就够分析 driller 用了。


我们看完 Tracer 继续往下看:

1
2
3
4
5
6
7
8
9
10
11
p = angr.Project(self.binary)
for addr, proc in self._hooks.items():
p.hook(addr, proc)
l.debug("Hooking %#x -> %s...", addr, proc.display_name)
if p.loader.main_object.os == 'cgc':
p.simos.syscall_library.update(angr.SIM_LIBRARIES['cgcabi_tracer'])

s = p.factory.entry_state(stdin=angr.SimFileStream, flag_page=r.magic, mode='tracing')
else:
s = p.factory.full_init_state(stdin=angr.SimFileStream, mode='tracing')
s.preconstrainer.preconstrain_file(self.input, s.posix.stdin, True)

这段代码也很好看,首先创建一个待符号执行的 binary 的 angr Project 为 p 。然后根据初始化Driller类成员时传入的 hooks(要 hook 的函数)在项目 p 中对其进行 hook 操作。接着,判断程序的目标操作系统,根据其是否为 cgc 类型来确定程序开始符号执行时的程序状态(状态预设),当 binary 为非 cgc 程序时,将调用 full_inti_state 状态构造函数。这里对是否是 cgc 程序的判断相当于是对 cgc 程序单独做了额外的优化。最后,调用 preconstrainer_file 方法对文件预先设置约束,将 s.posix.stdin ( concolic 执行的输入)设置为 self.input (传递给 Driller 的seed),True 参数表示将文件内容解析为具体的数据值。

接下来,就是重要的地方了,exploration_techniquesuse_techniques ,关于这两个的介绍,我在网上找了好久的博客都没有找到详细介绍的,而且我对 angr 是如何使用 exploration_techniques 尤其是多个并用非常疑惑和好奇,问了ChatGPT也看的比较懵,所以还是得自己一点一点啃源码理解。继续看 self._dirll_input() 代码:

1
2
3
4
5
6
simgr = p.factory.simulation_manager(s, save_unsat=True, hierarchy=False, save_unconstrained=r.crash_mode)
t = angr.exploration_techniques.Tracer(trace=r.trace, crash_addr=r.crash_addr, copy_states=True, follow_unsat=True)
self._core = angr.exploration_techniques.DrillerCore(trace=r.trace, fuzz_bitmap=self.fuzz_bitmap)
simgr.use_technique(t)
simgr.use_technique(angr.exploration_techniques.Oppologist())
simgr.use_technique(self._core)

这里我最好奇的点是,这些探索技术是如何运用到探索过程中的,如果之前看过 angr exploration_techniques 模块的源码,会发现,几乎每一个类中都有 step() 方法,只执行simgr.step() 的情况下,这些方法是如何跟 simulation_manage 类中的 step() 方法结合协作选择下一个状态呢?接下来,我们就来一点一点分析。

首先,我们通过 simulation_manager() 方法得到一个 SimulationManager 对象 simgr,用来管理我们后续符号执行得到的状态。

接下来,就是创建所需要的 exploration_techniques 对象,driller 一共创建了三个,分别为:

  • Tracer():An exploration technique that follows an angr path with a concrete input. The tracing result is the state at the last address of the trace, which can be found in the ‘traced’ stash. If the given concrete input makes the program crash, you should provide crash_addr, and the crashing state will be found in the ‘crashed’ stash.

  • Oppologist():The Oppologist is an exploration technique that forces uncooperative code through qemu.

  • DrillerCore():An exploration technique that symbolically follows an input looking for new state transitions. It has to be used with Tracer exploration technique. Results are put in ‘diverted’ stash.

接下来,simgr 分别调用 use_technique() 函数来应用创建的探索技术。use_technique() 函数源码在 simulation_manage.py 中:

1
2
3
4
5
6
7
8
9
10
11
12
13
14
15
16
17
18
19
20
21
22
23
24
def use_technique(self, tech):
"""
Use an exploration technique with this SimulationManager.

Techniques can be found in :mod:`angr.exploration_techniques`.

:param tech: An ExplorationTechnique object that contains code to modify
this SimulationManager's behavior.
:type tech: ExplorationTechnique
:return: The technique that was added, for convenience
"""
if not isinstance(tech, ExplorationTechnique):
raise SimulationManagerError

# XXX: as promised
tech.project = self._project
tech.setup(self)
# **tech._get_hooks() 理解:是一个参数解包操作,将tech._get_hooks()函数返回的字典作为关键字参数传递给HookSet.install_hooks()
# _get_hooks()函数返回一个字典,其中包含了exploration_techniques类中定义的一组钩子函数。这些钩子函数是通过检查_hook_list列表中的每个元素,并调用_is_overriden方法来确定是否被子类重写而生成的。
# 简单来说也就是返回应用的tech技术中,在_hook_list = ("step", "filter", "selector", "step_state", "successors")列表里面的,重新实现的函数。

HookSet.install_hooks(self, **tech._get_hooks())
self._techniques.append(tech)
return tech

可以看到,函数首先判断传入的参数 tech 是不是 ExplorationTechnique类型,然后调用该探索方法内置的 setup() 函数来做初始化(setup)操作。具体每一个探索技术的 setup() 函数的细节,这里先暂时跳过,等后边再开一节详细介绍。

然后调用 HookSet 类的静态方法 install_hooks() 函数来进行 hook ,这里就是 angr 如何利用多个探索技术的关键所在。我们首先解释下参数,然后再来看 HookSet 类及其静态方法的源码:

install_hooks 函数参数 **tech._get_hooks() 是一个参数解包操作,tech 是一个实例化的探索方法对象,tech._get_hooks() 函数是类的一个私有方法,定义在 angr exploration_techniques 目录下的 __init__.py 文件中,该文件定义了一个基类 ExplorationTechnique ,angr 自带的或自定义的探索方法均继承自这个类:

1
2
3
4
5
6
7
8
9
10
11
12
13
14
15
16
17
18
19
class ExplorationTechnique:
"""
An otiegnqwvk is a set of hooks for a simulation manager that assists in the implementation of new techniques in
symbolic exploration.

TODO: choose actual name for the functionality (techniques? strategies?)

Any number of these methods may be overridden by a subclass.
To use an exploration technique, call ``simgr.use_technique`` with an *instance* of the technique.
"""

# this is the master list of hook functinos
_hook_list = ("step", "filter", "selector", "step_state", "successors")

def _get_hooks(self):
return {name: getattr(self, name) for name in self._hook_list if self._is_overriden(name)}

def _is_overriden(self, name):
return getattr(self, name).__code__ is not getattr(ExplorationTechnique, name).__code__

我们可以看到,这里 _get_hooks 函数返回了一个字典,字典包含了在 _hook_list 中定义的钩子函数的名称和对应的方法。_get_hooks 函数通过列表推导式遍历 _hook_list 列表中的每个函数名称,并通过 _is_overridden() 函数检查该名称是否在当前对象中被覆写,如果被覆写了,也就说明被 hook 了,将其加入到字典中。

_is_overridden() 函数将当前对象 tech 中相应函数的 __code__ 属性与基类(父类 ExplorationTechnique)中对应函数的 __code__ 属性做对比,判断两者是否相等,若不相同,则表示对应函数被覆写,返回 True

解释完 HookSet.install_hooks() 函数的参数,我们来看下函数的实现,函数定义在 angr misc 目录下的 hookset.py 文件中:

1
2
3
4
5
6
7
8
9
10
11
12
13
14
15
16
17
18
19
20
21
22
23
24
class HookSet:
"""
A HookSet is a static class that provides the capability to apply many hooks to an object.
一个静态类,提供对象应用多个hooks的能力
"""

@staticmethod
def install_hooks(target, **hooks):
"""
Given the target `target`, apply the hooks given as keyword arguments to it.
If any targeted method has already been hooked, the hooks will not be overridden but will instead be pushed
into a list of pending hooks. The final behavior should be that all hooks call each other in a nested stack.
如果任何想要hook的目标方法已经被hook了,那么不会覆盖以前hook的函数,而是把新的hook插入到一个pending hooks列表里。
最终的行为应该是所有钩子在嵌套堆栈中相互调用。
:param target: Any object. Its methods named as keys in `hooks` will be replaced by `HookedMethod` objects.
:param hooks: Any keywords will be interpreted as hooks to apply. Each method named will hooked with the
corresponding function value.
"""
for name, hook in hooks.items():
func = getattr(target, name)
if not isinstance(func, HookedMethod):
func = HookedMethod(func) #这里将func实例化为HookedMethod对象,当在后面调用到func时,就会用到__call__魔法方法,将示例对象func作为函数,函数体就是__call__方法里的程序
setattr(target, name, func) #将新来的方法设置为栈顶
func.pending.append(hook)
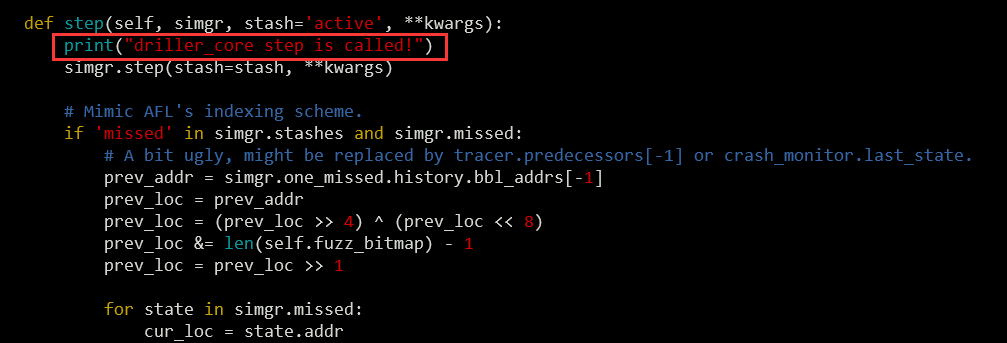
可以看到,函数遍历传入的 hooks 字典,并判断每一个字典内的每一个函数是否是 HookedMethod 类的示例对象。如果不是,就把通过getattr 函数获取到的对象方法作为参数来实例化一个 HookedMethod 对象。然后调用 setattr() 函数将原始的 simgr 的方法(比如 step )给 hook 成 Hooked Method(func) 类型的方法。最后将该函数方法添加到 HookedMethod 类的实例化对象 func 的属性 pending 列表中。

我们接下来看一下 HookedMethod 类的源码,跟 HookSet 定义在一起:

1
2
3
4
5
6
7
8
9
10
11
12
13
14
15
16
17
18
19
20
21
22
23
24
25
26
27
28
29
30
31
32
33
34
35
class HookedMethod:
"""
HookedMethod is a callable object which provides a stack of nested hooks.
HookedMethod 是一个可调用对象,它提供了一堆嵌套的钩子
:param func: The bottom-most function which provides the original functionality that is being hooked
最底层的函数提供被挂钩的原始功能
:ivar func: Same as the eponymous parameter
:ivar pending: The stack of hooks that have yet to be called. When this object is called, it will pop the last
function in this list and call it. The function should call this object again in order to request
the functionality of the original method, at which point the pop-dispatch mechanism will run
recursively until the stack is exhausted, at which point the original function will be called.
When the call returns, the hook will be restored to the stack.
尚未调用的hook堆栈。当调用该对象时,它将弹出该列表中的最后一个函数并调用它。该函数应该再次调用该对象,
以请求原始方法的功能,此时,pop-dispatch机制将运行直到堆栈耗尽,这时将调用原始函数。
当调用返回时,hook将被恢复到堆栈中
"""
def __init__(self, func):
self.func = func
self.pending = [] # 初始化 pending 列表
···
# 递归x 嵌套执行
# 接下来对主要对step函数做修改,输出信息,来看递归的具体过程
# 这里会先输出很多orig step is called,猜测是初始化到full_init_state时调用的,猜测是对的,在use_technique完毕之后,才开始使用探索策略中的step来探索。
def __call__(self, *args, **kwargs):
if self.pending:
current_hook = self.pending.pop()
try:
result = current_hook(self.func.__self__, *args, **kwargs) #<----嵌套执行处
# 无论是否发生异常,均会执行finally
finally:
self.pending.append(current_hook)
return result
else:
return self.func(*args, **kwargs)
···

这里边最重要的是魔法方法 __call__ ,当一个对象实现了 __call__ 方法时,它可以被当作函数一样使用,通过在对象后面加上括号来调用。这种方式类似于调用函数,实际上是调用了对象的 __call__ 方法。在上面,我们通过 setattr 函数设置完之后,当在 simgr 执行符号执行探索 binary 的过程中,调用被 hook 的方法时,实际上就是调用这里的 __call__ 方法。

当我们通过 use_teachnique() 函数使用多个 exploration_techniques 时,向 pending 列表中添加的每一个方法都是 HookedMethod 类对象。在被调用时都是调用 __call__ ,所以,这时候应该能反应过来,这里其实类似是一个递归函数。(其实应该是嵌套执行,这里把嵌套跟递归搞混了)

我们可以通过修改 angr 包的源码来做一下简单验证,_drill_input 中主要用到了 step 函数来进行符号执行探索,所以就以 step 函数为例做验证:

安装好的 angr 包所在的目录为:/usr/local/lib/python3.5/dist-packages/angr/,我们分别对 exploration_techniques 目录下用到的三种探索技术 Tracer 、Oppologist、DrillerCore 中的 step 方法,以及angr 原始的 step 方法(位于angr/sim_manager.py)添加一行代码,输出打印信息(以 DrillerCore 为例):

1
print("driller_core step is called!")

image-20230918094103338

同时在 __call__ 函数所在的 hookset.py 文件中定义一个全局变量来输出递归层数:

1
2
3
4
5
6
7
8
9
10
11
12
13
14
15
16
17
18
19
20
n = 0
···
calss Hookset:
def __call__(self, *args, **kwargs):
global n
if self.pending:
current_hook = self.pending.pop
print("current_hook is ",current_hook)
n = n + 1
print("Entering , n = ",n)

try:
result = current_hook(self.func.__self__, *args,**kwargs)
finally:
n = n - 1
print("Exiting, n = ",n)
self.pending.append(current_hook)
return result
else:
return self.func(*args, **kwargs)

修改完后,我们实际运行来验证一下:

1
python ./run_driller.py ./buggy workdir/output/fuzzer-master

注意:运行时需要保证 AFL 已经运行一段时间,生成了 ouput 目录,这里我是直接进入 docker 容器的 bash 跑的命令。

image-20230918095559741

从运行结果,我们可以看到,确实如刚才看源码分析的一致,这是一个递归(应该嵌套执行)的过程。通过我们打印的被 hook 的函数,我们也能看到除了 step 外,还有其他 hook_list 中的函数也被调用。以step为例,angr 按照 use_techniques() 函数中加载 exploration_technique 的逆顺序,来一层一层嵌套执行 step 函数,最后再调用最原始的 step() 函数。

其实这里的 pending 列表相当于一个,通过所用的 pop() 也能大概猜到,通过 popappend 实现出栈入栈操作,一层一层执行,最后再将栈给复原,进行下一次的探索。

这里我们还注意到,在嵌套执行开始前,还输出的一堆的 “original step is called!” ,这里其实是因为,angr要先将程序加载执行到我们通过初始状态构造函数所构造的状态,在这里是 full_init_state() 函数所定义的位置。可以通过在 use_techniques() 函数(位于angr/sim_manager.py)中也添加打印输出信息的方法来验证:

image-20230918100557240

其中,第一个与第二个 “use_technique is called!” 之间的 step 调用,是在应用 Tracer 的 setup 函数时调用的,此时还没进行 hook 操作。

到这里,基本上对于 “ angr 是如何将 exploration_techniques 应用到符号执行中的?” 这一个问题有了一个较为清晰的答案,就是通过嵌套执行的方式。对于angr是如何一步一步执行符号执行可以参考博客3。

我们再回到 self._drill_input() ,继续往下看:

1
2
3
4
5
6
7
8
9
10
11
12
13
14
15
16
17
18
19
20
21
22
23
24
25
# 设置对内存、寄存器符号化操作的阈值
self._set_concretizations(simgr.one_active)

l.debug("Drilling into %r.", self.input)
l.debug("Input is %r.", self.input)

while simgr.active and simgr.one_active.globals['trace_idx'] < len(r.trace) - 1:
simgr.step()

# Check here to see if a crash has been found.
if self.redis and self.redis.sismember(self.identifier + '-finished', True):
return
# diverted 应该是发生状态转移
if 'diverted' not in simgr.stashes:
continue
# 当检测到状态转移时,弹出状态 这里的diverted 是在DillerCore探索策略中的step方法中添加的
while simgr.diverted:
state = simgr.diverted.pop(0)
l.debug("Found a diverted state, exploring to some extent.")
# 首先调用_writeout来求解
w = self._writeout(state.history.bbl_addrs[-1], state)
if w is not None:
yield w
for i in self._symbolic_explorer_stub(state):
yield i

首先调用 self._set_concretizations 方法设置对内存、寄存器符号化操作的阈值,针对 cgc 程序单独做了优化,源码如下:

1
2
3
4
5
6
7
8
9
10
11
12
@staticmethod
def _set_concretizations(state):
if state.project.loader.main_object.os == 'cgc':
flag_vars = set()
for b in state.cgc.flag_bytes:
flag_vars.update(b.variables)
state.unicorn.always_concretize.update(flag_vars)
# Let's put conservative thresholds(阈值) for now.
# 设置了内存符号化的阈值。当符号状态中的内存符号化(例如,符号化的内存读取或写入操作)达到或超过 50000 个时,Unicorn 引擎将尝试将某些符号内存具体化为具体的值,以提高性能。
state.unicorn.concretization_threshold_memory = 50000
# 设置了寄存器符号化的阈值。当符号状态中的寄存器符号化(例如,符号化的寄存器读取或写入操作)达到或超过 50000 个时,Unicorn 引擎将尝试将某些符号寄存器具体化为具体的值,以提高性能。
state.unicorn.concretization_threshold_registers = 50000

然后通过 while 判断循环条件,不断通过 step() 进行符号执行。这里说一下循环条件中的 simgr.one_active.globals["trace_idx"] ,该变量定义在angr 探索技术 Tracer() 中的 setup() 函数中:

1
2
# initialize the state info
simgr.one_active.globals["trace_idx"] = idx

其中,idx 就代表执行路径 trace 的 index。

接下来,self.redis 应该是存储到 redis 数据库相关,暂时先不管。

再然后,判断 simgr.stashes 中存储的状态是否发生了转移,也就是是否有 diverted 。这里的 diverted 定义在 angr 探索技术 DrillerCore() 中的 step() 函数里。

如果检测到了 diverted 状态,将这个状态取出来,作为参数传递给 self._writeout 函数求解,如果求解成功,得到返回值 w,就调用 yield 语句返回,否则,调用 self._symbolic_explorer_stub(state) 函数来重新做符号执行求解并返回。

这里可以看到,最终 dirller 生成的 input 是通过 self._writeoutself._symbolic_explorer_stub 这两个函数来求解的。我们依次来看下这两个函数:

1
2
3
4
5
6
7
8
9
10
11
12
13
14
15
16
17
18
19
20
21
22
23
24
25
26
27
28
29
30
31
32
33
34
35
36
# 这里传入的参数是state.history.bbl_addrs[-1] 和 state
def _writeout(self, prev_addr, state):
# 通过load方法从符号状态的标准输入state.posix.stdin中加载数据,具体来说,它加载从文件描述符 0(通常是标准输入)开始的数据,直到当前标准输入位置 state.posix.stdin.pos 处。这个操作实际上模拟了从标准输入读取数据的过程,并将读取的数据保存在 generated 变量中。
generated = state.posix.stdin.load(0, state.posix.stdin.pos)
# 调用 eval 执行求解过程,得到的结果存储在 generated 变量中
generated = state.solver.eval(generated, cast_to=bytes)

key = (len(generated), prev_addr, state.addr)

# Checks here to see if the generation is worth writing to disk.
# If we generate too many inputs which are not really different we'll seriously slow down AFL.
# 调用_in_catalogue判断生成的input是否在之前的运行或者其他线程已经生成了,没有生成的话返回False
# <----跟redis相关,暂时不用管
if self._in_catalogue(*key):
# 如果生成了,那就从encounters中移除(addr,addr)?为什么要移除?
self._core.encounters.remove((prev_addr, state.addr))
return None

else:
self._add_to_catalogue(*key)
# ----->

l.debug("[%s] dumping input for %#x -> %#x.", self.identifier, prev_addr, state.addr)
# 把本次生成的值 以(key,generated)的形式加入到_generated集合里
self._generated.add((key, generated))
# <-------redis 相关,暂时不管
if self.redis:
# Publish it out in real-time so that inputs get there immediately.
channel = self.identifier + '-generated'

self.redis.publish(channel, pickle.dumps({'meta': key, 'data': generated, "tag": self.tag}))

else:
l.debug("Generated: %s", binascii.hexlify(generated))
#-------->
return (key, generated)
1
2
3
4
5
6
7
8
9
10
11
12
13
14
15
16
17
18
19
20
21
22
23
24
25
26
27
28
29
30
31
32
33
34
35
36
37
38
39
40
41
42
43
44
def _symbolic_explorer_stub(self, state):
# Create a new simulation manager and step it forward up to 1024
# accumulated active states or steps.
steps = 0 # 记录步数的计数器,用于限制探索的步数。
accumulated = 1 # 累积的活跃状态或步数的计数器,用于控制探索的终止条件。

p = state.project
state = state.copy() #复制传入的状态 diverted,以便在符号执行过程中进行修改。
try:
# 移除状态选项中的 LAZY_SOLVES 以确保在符号执行期间进行及时求解
state.options.remove(angr.options.LAZY_SOLVES)
except KeyError:
pass
# 创建状态管理器,用于符号执行,hierarchy=False 表示不使用层次结构模式(这里的层级结构还不是很清楚)。
simgr = p.factory.simulation_manager(state, hierarchy=False)

l.debug("[%s] started symbolic exploration at %s.", self.identifier, time.ctime())
# 当还有活跃状态且累积计数小于 1024 时,进入循环。
while len(simgr.active) and accumulated < 1024:
simgr.step()
steps += 1 # 增加步数计数器。

# Dump all inputs.
# 根据步数和活跃状态数以及已结束状态数更新累积计数器。
accumulated = steps * (len(simgr.active) + len(simgr.deadended))

l.debug("[%s] stopped symbolic exploration at %s.", self.identifier, time.ctime())

# DO NOT think this is the same as using only the deadended stashes. this merges deadended and active
# 将已经结束的状态合并到活跃状态中
simgr.stash(from_stash='deadended', to_stash='active')
# 遍历所有的 active 状态
for dumpable in simgr.active:
try:
# 检查状态是否是可满足的。
if dumpable.satisfiable():
# 如果可满足就调用 _writeout 函数进行求解,然后通过 yield 返回
w = self._writeout(dumpable.history.bbl_addrs[-1], dumpable)
if w is not None:
yield w

# If the state we're trying to dump wasn't actually satisfiable.
except IndexError:
pass

这里我对 _symbolic_explorer_stub 函数的理解是,边进行符号执行边做约束求解操作,这样就可以在符号执行 step 步进状态的同时直接判断出哪些状态是不可达的,即 deadended。不可达的路径就意味着新的分支,所以最后要把 deadended 与 active 合并,全部进行求解,这样能生成获得更多导致执行不同分支的 input ,从而可能增加 AFL 的代码覆盖率。

总结

本篇从整体程序的执行流程来分析 Driller 工具的功能,并针对 use_techniques 方法进行了较为详细的解释,理清了 angr 是如何同时应用多个 exploration_techniques 来协同进行符号执行的。但并未对每种探索技术中 hook 方法(比如,setup 和 step 函数等)进行详细的介绍,个人感觉这方面是理解 Driller 工具运作细节的重点。

参考博客

参考自博客:

  1. https://n132.github.io/2020/03/19/Driller.html

  2. https://github.com/n132/n132.github.io/blob/master/_posts/2020-03-26-Driller2.md

  3. https://www.anquanke.com/post/id/251983#h3-2